Sunday, January 8, 2012

Gingerbread to-day

Happy Christmas . . .well, it was in Ethiopia and the Ukraine yesterday, right?
In keeping with all these late Christmas posts, this is what we did today! Yep, we made gingerbread men 2 weeks after Christmas!
Didn't they turn out fabulous?
Here are the fine artists--so serious about this fun activity!
 Yep, it was lots of fun!
 Happy family fun this new year!

Saturday, January 7, 2012

O Little Town. . . in a Formula Can

I know this is kinda late to post as it is a Christmas project to do in the classroom (or at home), but I just can't wait until next year to do it! And it turned out so nice, so. . .here you go!

My "inspiration" for this project came from two places. One, I had a collection of formula cans sitting in my basement collecting dust. (I'm dutch or thrifty. . .take your pick! I can't throw away something that could be useful!) Two, I found these cute printables that I thought HAD to be used for something good!
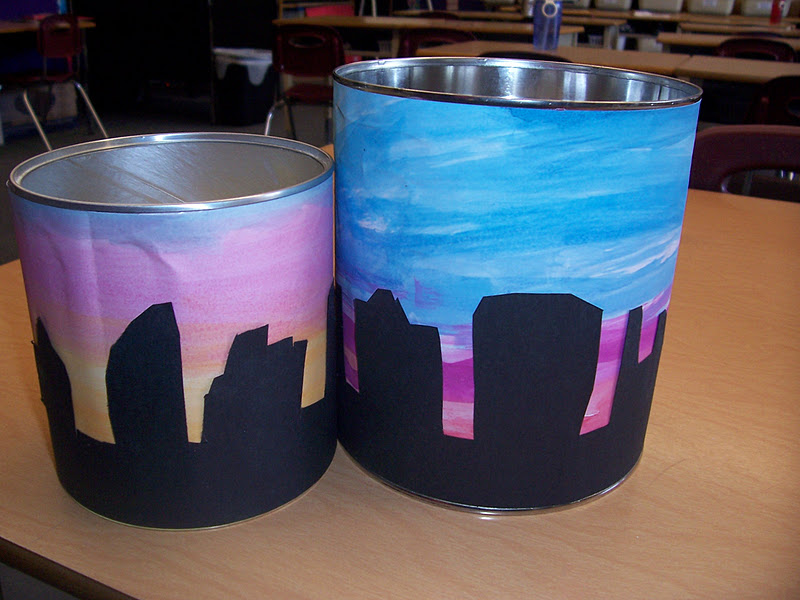
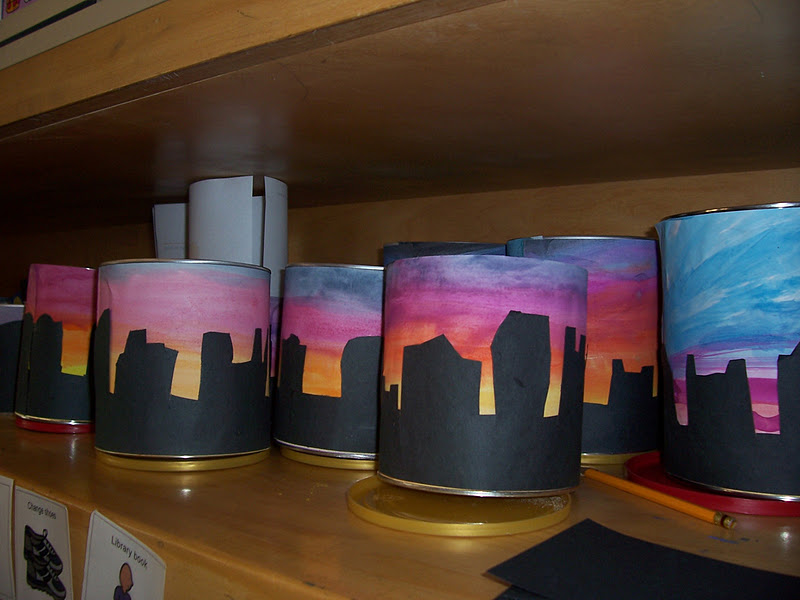
So, here is what I did. . .I took a project that I had done every year, and changed it into a 3D storytelling can. Here is the 3D version of "O Little Town of Bethlehem."

 Unfortunately, I can't find a picture of a finished project right now. . .but below is the general idea. The kids would either paint or use pastels to make the night sky. Then we would make the town of Bethlehem as a silhouette, glue it on, and put starts in the sky--by way of shiny stickers, stamps or paint. For this project, I did all that still, but instead of just mounting them on a black background and hanging them up on the wall, we put them on a can. Check it out:

You can use formula cans, hot chocolate or coffee cans. . .whatever.

I did this project in small parts, mostly with the help of parent helpers in the classroom or as a centre activity here and there. The first part was paining the sunset background. We talked about blending the colours together to make a night sky.
 The second part was making the town of Bethlehem. We read the Bible story and looked at some picture Bibles as well to get an idea of what kinds of houses and inns Mary and Joseph might have seen the night they came to Bethlehem. Then we drew them. Below is my "instructions" for a Centre activity.
 Once we had glued the "town" onto the background, we cut the background to the size of the can and glued it onto the can. (Next time I might first cut the papers to the size of the can as a bunch of the colours that that kids mixed to make the sunset background got chopped off. It still looks fine, but I would rather see more colours!)
 Here are the kids gluing the backgrounds onto the cans.
 And holding the edges together to make sure it stuck in place!
 Here are the cans resting until the next step.
 Next we added wire to the top as a handle for the cans. . .and to use as a place to have our Bethlehem star hang from.


 A bunch of the cans with the wires on them. . .the cardboard cans were easier--obviously. I used a hammer and nail for all of them and the kids put the wires through, but I had to actually work at getting a hole in the metal ones!
 Then we punched out some stars with a craft punch, glued two together at the ends of some yellow embroidery floss
 Then tied a bow. . .and there is a hanging Bethlehem star.
 There are no pictures of it, but at a centre, we cut out these printables, and glued them on to strips of construction paper folded in half in order to stand up. These we stored in out cans. We also added 4 Popsicle sticks used to make the outline of a stable, three wise men, and a pasture for the shepherds.
 Each year in class we have a booklet of the Christmas story. Each page has the story in an "easy-to-read" form and a space to create a directed-drawing picture. These books became more meaningful this year, as the kids were able to read their story along with their project. After each page read, the kids would get to "act out" the story using their characters and their town of Bethlehem. They LOVED it!
 We practiced reading it together and acting it out as a whole class. Then, they got to team up with their grade three buddies and read/ tell the story of Christ's birth.
 Below if a "final" scene from one group.
We will see if I can do this project again next year. . .with no more formula in the house. . .I need to start drinking a lot of coffee and hot chocolate in order to save up enough cans!

Wednesday, January 4, 2012

Christmas done

Happy new year to all!
As celebrated by Princess A! (Her glass is soon to be filled with milk for supper!)
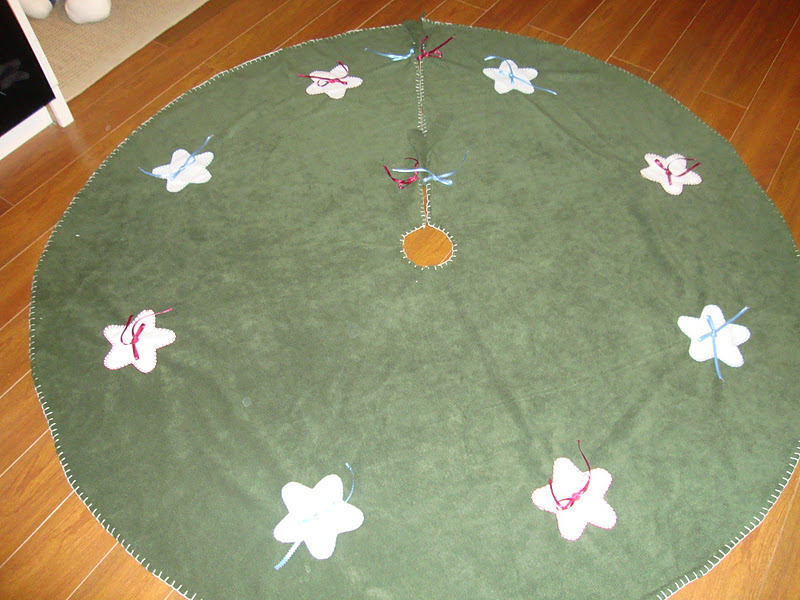
 I got my little Christmas tree skirt done. . .on January 1st! Even our Christmas decorations were taken down already! I took a picture or two and then packed it into the box for next year!
That stitching sure takes forever!
 I changed a few things about it. . .I had originally used embroidery floss as the centre of the stars, but didn't like it, so I changed it to ribbon bows there instead.
 I also made some ties, for if I don't just overlap the circle around the tree.
 A maroon star. . .and the edging of the entire circle.

Project done! It only took 3 days to post about it! I'm a little behind on a few things!

Friday, December 23, 2011

Christmas softies, take 2

I posted earlier about making these little felt ornaments.
 In the meantime, I tried to make a different shape. I just don't love it so much. I think I am a fan of  stars.
 Eventually I did get some white to make the candy cane stars. LOVE them!
 And after much contemplation-wanting to make snowflakes, and then ornaments, then this, then that-I went back to the original idea of stars for the tree skirt I was hoping to make by Christmas. I decided to make them white with maroon/magenta and light blue stitching. I hate matching colours. I took a snowman decoration from our house I liked and matched the colours to it.
 So here is my start. . .
 A finished blue. . .
 And a finished maroon/magenta . . .
I still need to stitch the outer edges of the tree skirt. . .
We will have to see if it gets done. It is an ice-skating kind of evening for me and my son tonight, so I don't think much will get done. At least it should be done for next Christmas!

A little pre-Christmas

I can't believe how long it has been since I posted last!
I can believe that I have been having an awesome week with my kiddos so far!
A busy end to school. . .and now it is a lot of playing. No sleeping in for me, but I can't ask for too much, right?
Last night the kids got a surprise visit from Santa! Yep, Santa came right to our door! Along with two firetrucks and a bunch of firemen on their way to the hospital to spread some Christmas cheer there. It was a nice pre-visit for my kids--their eyes were HUGE as they looked at a "real" Santa that close!-- and they each got a stuffy from Santa as well.

 The kids have been busy making cards. . .here is one E had for a teacher/helper at his school. "Real Christmas cards are just kinda boring, unless they have glitter"--according to him.
 Crazy me always have my kiddos help me make cards of some kind. I started this when E was 3, I think. They love it, but I am crazy for doing it! This year we made cards using recycled materials (cards, paper, left-over craft materials, etc.) We didn't get very far. . .I think we only made 19. And I also haven't sent too many off yet. . .too busy!
 But never too busy for. . .
A hot chocolate break!
 The Christmas picture we finally settled on. . .after all the other failures! But then, who knows if anyone will see it as the Christmas cards are not being used so much yet.
 More Christmas crafts/ornaments that need to be made. . .
 Yep, one craft a day is how it has been going down at our house. In addition to the other "creative messes" we have going on, of course.
And to close this overdue post. . . 
This is the first picture with Santa the kids have ever had. We finally decided that this year Santa wasn't so scary! (Although, from the photo, I can't tell that Princess A is convinced. She did find him later so she could give him a hug!)
Blessings to you during this holiday season!

Saturday, November 12, 2011

A little Christmas softie

I was home on my own on Friday night, and decided to try out a little craft. It was one of those nights where I had two loads of laundry to fold and a movie to watch.
(As a side note, it was WWJD (What Would Jesus Do? with John Schneider and Adam Gregory . . . got it from the library. . . and was quite impressed with its message, just FYI. Good to watch . . . not raving about the acting or anything like that, but a good movie to still watch and I am not regretting it. I liked Fireproof a lot too, for that same reason. So. . .that is my take.)
I had wanted to make a tree skirt for my Christmas tree--knowing full well I should start that NOW if I wanted to get it done by the time we set up the tree! I had this great idea, but wanted to test out the stitching before doing it on the final project. . .so I decided to make a little Christmas ornament. I got this idea from here. (BTW--adorable blog!) I was going to make it look EXACTLY the same! When I was looking for my felt, it turned out my "white" was actually a white with apple green polka dots! Hmmm. . .what to do.
 I did a little google search for Christmas colour trends, and found this fantastic photo. I loved all the bright colours. . .not sure I would ever try it in my own house, but loved the colours together . . . which gave me the confidence to keep trying my little softie.
(image from here)

I chose a deep magenta-kind of purple embroidery floss. Then I put the two star shapes together and started my stitching. Blanket stitching, I believe it is called.
 Okay, okay. I got too excited! Back up to the beginning. This is what you want to do first: Get a star pattern. Cut out two. Choose embroidery floss and get a needle.
 THEN, start stitching! I tried to get some close-up photos to show you my stitching. You just do your regular go in the back and come out the front stitching . . .
 . . .except that when you are ready to go in the back you need to thread it through your loop.
 That will "hook" the top and make that nice line along the outer edge of your piece of felt.
(And for some reason, I want to do this stitching around about 10 stars on my Christmas tree skirt!!! What am I thinking?!!?)


 At about this point, I decided to get some of my "stuffing" (quilting batting for me) to make it poofy and soft.
 Once it is full, I finished stitching around the last point of my star, made a loop for hanging. And there  you go--a star.
 However, I added a little star button (just lighter than my embroidery floss) and the extra floss in a bow. I placed it just off to the side of the centre of my ornament (although it is kinda hard to see from the picture.
I think I will have a bunch of nights like this if I am going to finish up that tree skirt idea of mine. . .
anyone want to come for a crafting/coffee/cookies night?
Happy crafting!